Okay so now you have Tomcat integrated with Eclipse. When you integrate with Eclipse, Eclipse keeps what's known as a "metadata" copy of Tomcat information.
The reason for this is apparent if you were using a remote Tomcat that you didn't have the configuration files on some network share that you could access. Tomcat provides a way to "publish" a web application via an upload. However, for security reasons, you cannot change configuration files like this. So you have to tune the Eclipse copy of the configuration files to match the server configuration before you have an In-Sync copy of the server on the local machine.
Let's head to Eclipse and understand this a little better. On the Server tab right mouse click on your Tomcat server and select Properties.
 |
| The Properties of the server. Location circled in red. |
This metadata location is [wherever you have your Eclipse workspace]/.metadata/.plugins/org.eclipse.wst.server.core/tmp0
I store my workspace in ~/src/eclipse-workspace, so my metadata copy of Tomcat is located in ~/src/eclipse-workspace/.metadata/.plugins/org.eclipse.wst.server.core/tmp0
Also note one more thing. If you have more than one server in Eclipse, then you'll notice a tmp0, tmp1, tmp2… The servers are numbered in the order in which they appear in Eclipse from top down.
Okay, so basically we could just change our location that we are using, but it is important to keep our copy in-sync in the Eclipse metadata. So we are going to copy the example pages from the Tomcat install that we have in our bin folder to our copy in the metadata storage.
So head over to "bin/apache-tomcat-7.0.33/webapps/", or wherever you've extracted your Tomcat install. There you will see the web applications that come with Tomcat. They are:
- docs — which is really just a bunch of pages of Tomcat documentation bundled up as a web application.
- examples — which are the example servlets and JSPs and the code for those examples. I'll go ahead and state that a lot of the examples are a bit out of date.
- host-manager — I've never really used this web application but I believe that it allows you to control somethings in Tomcat via the web, which is silly, because that's a huge security hole.
- manager — Which I think is a program that allows you to handle the web container side of Tomcat via the web. Again, I've never used it.
- ROOT — This is just a little welcome to Tomcat JSP application. It acts as a hub for linking to all of the other web applications I just listed.
I'm sure you are starting to notice that web applications that you install in Tomcat are basically, stored in a folder and that folder is stored in the "webapps" folder. You would be absolutely correct. When we go to install an application into Tomcat, we simply just put the folder with all our files, images, and java classes into the webapps folder in Tomcat. There a little more to it, like configuring connections to a database, restricting access to authenticated users and what-not, but that's the gist of very basic web applications.
So, basically what we are going to do, is copy the ROOT and examples web applications from the Tomcat folder and paste the folders into our metadata copy.
- Copy the ROOT and examples folder from the ~/bin/apache-tomcat-7.0.33/webapps/ folder.
- Paste the folders in the ~/src/eclipse-workspace/.metadata/.plugins/org.eclipse.wst.server.core/tmp0/wtpwebapps folder.
If you get a prompt to "merge" thing just go ahead and click "OK".
Now hope back into Eclipse, start up your server from Eclipse, open browser to http://localhost:8080 and poof! You should now see the Tomcat welcome page as oppose to the 404 error you got last time.
Making your first servlet...
And now it is time to make your very own servlet! I know exciting! Here's the basic breakdown.
Tomcat is expecting your Java class files to have certain hooks that it can latch onto, in order to run your Java code. It use to be that your class would have to extend a standard base class and then you'd create an XML file that the server would read which would help it to figure out how to latch onto your class file. It was all a very crazy mixture of XML files and Interfaces. The nice thing about Java servlet version 3.0 is, you don't have to do that any more! Hooray!! There are these things now called Java annotations that you can add to your class file. Annotations don't do anything code wise, but they allow you to mark certain sections of your code as something, sort of like HTML markup. Basically, you can now annotate you Java class, and Tomcat will read the annotations to figure out how to hook into your Java class.
Easy stuff! You can still do it the old way. In fact, if you do provide an XML file, it will override whatever annotations are found. The old way is still very useful for commercial products that just give you compiled class files and allow you to fine tune the program for your needs by editing XML files. You obviously can't change the annotations in a compiled class file.
So our very first servlet is basically going to write to the screen, the current time and "Hello, world!". To begin, let's click on the "New Project" button on the toolbar. Here's a picture of the button.
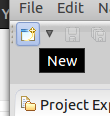 |
| This creates a new project |
 |
| Dynamic Web Project |
 |
| This is one of three screens in the wizard but this is the only one I'll be covering for now. |
Go ahead and click Finish as you won't need any of the other steps from the wizard.
You will now see your new project in the "Project Explorer".
 |
| The new project "helloone" and all the different groups under it. |
A servlet is a Java resource so we will right mouse click on "Java Resources" and choose New → Class and get the "New Java Class Wizard". We just want to create a very basic class, so just fill out the dialog as follows:
 |
| This creates a very, very basic class in Java |
 |
| Our new class added |
@WebServlet("/Hello")
Eclipse will underline this statement with a red wavy underline. That means there is a problem with the code. move you cursor so that it is somewhere within the offending code and a "quick fix" tool tip will appear. Click on the quick fix to "import javax.servlet.annotation.WebServlet". This will add the import statement to your class file.
Now we are going to say our class extends the basic HttpServlet class. We need to extend this class as it brings in all the needed hooks into our class that Tomcat is expecting. To extend our class we just need to add a bit of code.
| Change this... | To this... |
| public class SayHelloServlet | public class SayHelloServlet extends HttpServlet |
So basically you are just adding "extends HttpServlet" to the end of the class statement. Eclipse will yet again, underline the new code. Click on the code and in the quick fix, import the javax.servlet.http.HttpServlet class.
You should now see a little light bulb with a warning exclamation sign on it.

That means Eclipse wants to help you out on something. Usually, these things won't keep your code from working but it's good form to address something here. In this case, HttpServlet is marked Serializable, and thus your class should provide a Version UID. It's a good idea to go ahead and do this. I usually just go for the default value as opposed to a randomly generated one. Click on the light bulb and make your choice.
The default UID looks like this:
private static final long serialVersionUID = 1L;
Okay now, all of the underlines and light bulbs have been dismissed. We now have all the hooks that we need for Tomcat to interact with with our class, but at the moment, absolutely nothing will happen. So let's make something happen!
First things, first. Let's create a no argument constructor. It's important that we at the very least have this going forward. To do this in the outline pane on the right, right mouse click the class (that's the green ball C).
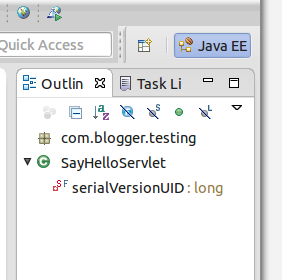 |
| This is the outline pane, very useful for moving around in classes |
Once you right click select Source → Generate Constructors From Superclass... You don't really need to mess with the dialog that pops up, just click OK. Now you have your no argument constructor. Next we need to override the "doGet" method from HttpServlet.
The reason we will be over riding this method is that when the web server receives a HTTP GET request from a client, the web container will call this method. By default the method does nothing, in fact, by default all of the methods do nothing. You are going to over ride this method with your own custom method.
To over ride the method, again, right mouse click on the class in the Outline pane and select Source → Override / Implement Methods... A dialog will appear and you should select the "doGet" method by checking the box beside it. You can also do some automatic generation of the comments for this over ride by checking the box to do so toward the bottom of the dialog. I usually don't however as I like my own comments on code.
You'll see that in the code editor pane the new code has been added. Go ahead and remove the code that says:
super.doGet(req, resp);
That removes any reference to the default code of "do nothing". Now, you are ready to implement your own response. Take a look at my code below and I'll explain what I did right after.
package com.blogger.testing;

import java.io.IOException;

import javax.servlet.ServletException;
import javax.servlet.annotation.WebServlet;
import javax.servlet.http.HttpServlet;
import javax.servlet.http.HttpServletRequest;
import javax.servlet.http.HttpServletResponse;

@WebServlet("/Hello")
public class SayHelloServlet extends HttpServlet {

 public SayHelloServlet() {
  super();
  // TODO Auto-generated constructor stub
 }

 private static final long serialVersionUID = 1L;

 @Override
 protected void doGet(HttpServletRequest req, HttpServletResponse resp)
   throws ServletException, IOException {
  // TODO Auto-generated method stub
  java.util.Date d = new java.util.Date();
  java.io.PrintWriter pw = resp.getWriter();
  resp.setContentType("text/html");
  pw.println("<html><head><title>Sample 01</title></head><body>");
  pw.println("<h1>" + d.toString() + "</h1>");
  pw.println("Hello, World!");
  pw.println("</body></html>");
 }

}
You can always remove all of those TODO comments out of the code. As you can see. I create a new java.util.Date called d. That stores our date. Next I created a PrintWriter called pw. This will provide us a way to write to the response that will be sent back to the client.
I then start writing HTML to the print writer and I convert the date to a string so that it can be written to the print writer.
So that's about it, now let's go ahead and run this servlet and see what happens! To run the program that we've just created, in the project explorer (remember the pane on the left), right mouse click on the top level object of our project (looks like a blue folder called helloone) and choose Run As → Run on Server option.
A run dialog will appear but you can just click on the Finish button.
And... WAIT! You got a 404 error!? Of course you did. If you look back at our code notice the @WebServlet("/Hello") part. The part in quotes is what you need to add to the URL to get the results. So the correct location should be…
http://localhost:8080/helloone/Hello
The helloone is the name of the web application and Hello is the name of the servlet inside the web application.
 |
| Hooray our first servlet! |
I will try to make it clearer as to the purpose of servlets, but for now, you've had the ability to sink your teeth into it a little bit. I'll try not to make the post this crazy long again, but I did cover a lot of fundamentals here.
Cheers!
Cheers!
No comments:
Post a Comment